Monday, August 31, 2009

Review from Booknosher

Thanks for the great write-up Booknosher! Click here to read their review of What Can You Do with an Old Red Shoe?

"Anna Alter has written and illustrated a delightful book with twelve recycling projects that kids will love."

*blush*

Friday, August 28, 2009

Furball Friday

Thursday, August 27, 2009

Made by hand: paper bag flowers

Early on in our wedding planning, fellow planner-in-crime Alison discovered this ingenious craft by Martha Stewart. I love how simple the project and sweet the result. After months of contemplating a million options for how to decorate the room where we held dancing after our wedding, we decided these paper flowers were a quick, easy, and charming way to go.

Here is how to make them...

You'll need about 9-12 bags depending on the size of the flower and how big you want the petals to look (the more bags the smaller the petals). I bought yellow, green, and white bags from Michaels in a few different sizes.

The first thing you do is cut off the bottom of the bags.


Next cut a petal shape by trimming the top edges of the bags.


Using a hole punch, punch a hole in the center of each bag, along the bottom edge.


Attach the bags to each other by placing a small (2-3 inches in this case) piece of double stick tape to the bottom side edges of each bag, then place another bag on top of it. Don't adhere the whole edge, just the bottom bit, or the flower won't open.


Once all the bags are taped to one another, string ribbon, yarn, or thread of some kind through the holes and tie a knot. This part is a little tricky because if you make the loop too small the flower won't open, and if you make it too big it will be too loose. So you might have to experiment a little.


When you're ready to hang the flower, tie a long piece of ribbon or yarn or thread to the loop. Then put some double stick tape on the top paper bag, and pull the bag on the bottom around to meet it. Make sure the long piece you've attached hangs down the center of the top flower petal (between taped edges). You will use this to hang the flower with.


Wednesday, August 26, 2009

Saturday, August 22, 2009

A lovely Red Shoe review

What Can You Do with an Old Red Shoe? got a lovely write-up over at The Well-Read Child, check it out here!

An excerpt:

"Taking care of the Earth, reusing, and recycling is very important to me, and today you see a lot of books, cartoons, commercials, and toys that aim to teach kids how to do this. However, there are few products that actually seem as if they'd be interesting to kids.

Anna Alter's What Can You Do with an Old Red Shoe?: A Green Activity Book About Reuse is an exception...

...Not only is this a good book that offers fun crafts and activities for families to do together, but it shows children how to help keep 'junk' out of the landfill and how to turn old objects into useful items."

Friday, August 21, 2009

Furball Friday

Ever since I started painting my new book, George and Wilbur have decided my drafting table is their favorite place to sleep. They like to be where the action is.

Thursday, August 20, 2009

Made by hand: organza roses

Early on in wedding planning I posted about making organza roses, but didn't include much of a "how to" or include the end result, so I thought I'd do that here.

I got the idea from browsing on Etsy, looking at the lovely fabric flowers made by Viemoderne and Tijusai:


So I searched around on the internet for instructions so I could make my own. Turns out its really pretty simple.

First you get your hands on some synthetic organza fabric and cut out circles of varying sizes:


Next, you run the edges of the circles over a flame for just a second (too long and the fabric will discolor). I used tweezers to hold the thin, slippery fabric.


Heating the edge of the fabric will melt and curl the edges slightly. I wanted relatively flat petals, so I gave the fabric less time over the flame. For a more curled petal, leave it a touch longer.


Layer the petals on top of one another. I alternated a matte organza with a shiny one to mirror the matte/shiny stripes in my dress.


Hold them together by sewing through the center, anchoring the stitch on the top of the flower with a bead of some kind. I picked a tiny glass bead because I wanted a pared down look, but you can use any combination of colorful beads in varying sizes.


Before the wedding I pinned a few to my waistband.


I also sewed a few to bobby pins for my hair.

Tuesday, August 18, 2009

Looking back

I was going to post the second half of my work-in-progress post from last week, but I was inspired by Alvina's post on Blue Rose Girls yesterday to look back at the beginning of my career and my very first real job (the rest of the Desmond painting post will go up next week). Her journal entry reminds me of just how wide-eyed I was too!

I started out in publishing about 12 years ago. My first "real job" out of college was at Houghton Mifflin Company, working as the assistant to the art director in the children's book department. I was just as excited as Alvina when I got that call. But I think made WAY more mistakes and looking back I'm surprised I ever got it in the first place.

The job I had actually applied for was a designer position in the children's book department. I'd seen the listing in my school job newsletter and thought it would be a great way to get some professional experience in the kid's book world, which I was desperate to be a part of. So while I'd never taken a graphic design class and had no idea what was involved in designing a book, I decided to apply. I didn't have a computer, so I took out some stationary I had made in a college class and hand wrote a letter to the art director that was not even remotely professional. I cringe to think back about it. I think I explained my love for children's books in some kind of rambling fashion. I remember running out of room at the bottom of the page.

By some kind of random stroke of luck I got a message on my answering machine a week or so later asking me to come in for an interview. Then I made my big mistake #2: I forgot what job I had applied for. I was sending out so many resumes at that point, I had sort of sent out the letter with great hopes then moved on to the next plan to support myself as an artist and forgot all details about it. So when I called back about the interview I actually asked what job they were calling about. Ha. Thank goodness for polite, kind people.

Anyways, I interviewed for the job, and it was instantly clear I'm sure that I knew little if nothing about book design. Also, I knew nothing about how to dress or prepare for a real interview. I went to art school. So when I was picking out my outfit I thought "if there are no holes or paint on my clothes, I will look professional!" I am sure that I did not look professional.

But somehow, the art director was merciful. He happened to need an assistant so he offered me that job instead. Maybe it was my passion for books, or maybe he just thought it would be entertaining to have an employee who had no clue how to interact in a business setting. On casual Fridays I remember wearing giant farmer's overalls cut off at the hem, a flannel shirt, worn out lace-up boots, and my hair in pigtail braids. I got *lots* of funny looks from the suits who had dressed down in khaki's, and quickly realized "farmer-wear" was not the same as business casual. I remember when I was introduced at the company wide sales conference I stood up and curtsied. I don't know why. I guess I thought it was more formal than just nodding my head.

But thank goodness for that job. If I hadn't gotten that peek into the inside of the publishing world, I don't think I ever would have mustered the courage to start submitting my illustrations and book dummies to publishing houses. Everyone I worked with there was gracious and patient and gave me great advice all along the way. And I got a taste of the kind of passion and dedication editors, designers, marketers, and productions teams have for books- which assured me that I had found my place, even if I stumbled a lot along the way.

Friday, August 14, 2009

Furball Friday

Yes, I am sleeping on your painting. No, I am not going to move.

Thursday, August 13, 2009

Made by hand: paper cranes

More wedding craft talk! I am almost through our craft-y wedding details, I hope you won't mind me indulging me a few more posts... if you're not into weddings though, please do skip ahead.

An element of our handmade wedding that was especially meaningful were the strings of origami cranes created by my mother and our guests. This was a spontaneous project in that I had been so distracted by the rest of my wedding planning that I'd neglected giving much thought to decorating the ceremony site. Fortunately my mom loves to make cranes and has been doing it since I was a kid, so we picked up some pretty origami sheets on our way up to the wedding site.

The day before the wedding everyone pitched in to help with great enthusiasm. Before long we had a rotating table of crane-makers, instructed by my mom, working late into the evening.


She takes her crane making very seriously; there were breathing techniques applied and lots of careful mental focus. As exhibited here by Alvina (fellow Blue Rose Girl), very sweetly at work.


The next day the cranes were carefully strung together (here the mother of the groom does some stringing).


Our photographer, Kelly Lorenz, got some beautiful shots of them as they were assembled,


hung from our wedding tree,


and around the edge of the tent.


It was so lovely to be surrounded by little works of art made by our friends and family as we got married.

Wednesday, August 12, 2009

The book vs the Kindle

The Green Apple Bookstore in San Francisco has put together a very clever series of videos comparing the book to the Kindle. Check out the smackdown on their blog here.

My favorite episode features kid's books, of course:

Tuesday, August 11, 2009

One month anniversary

Okay this was taken at our one week anniversary, but its all I got. One month ago today we got married. Yay.

Disappearing Desmond painting in progress

For those of you who emailed and commented and facebooked about the Desmond jacket last week- thanks for your input! We did indeed pick image number two (the fence one). Its good to know you pretty much all agreed.

This week I am painting...

The sketch:


The underpainting:


Layering on the color:


Building up the color/texture of the sand and the waves:


Still working on the background, and adding color to the figures:


To be continued next week!

Monday, August 10, 2009

"It is a book of spelling wonderness."

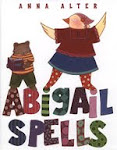
Okay this has got to be one of my favorite reviews of any of my books. If you haven't seen this blog yet beware- you will get hooked! Bookie Wookie is a book review blog run by a dad and his 3 very clever kids. Their musings about various books are both hilarious and insightful. Click here to read their discussion about Abigail Spells.

Some drawings of Abigail and George by reviewers Gracie, Lily, and Isaac:


Friday, August 07, 2009

Furball Friday: guest furball

I went to a petting zoo a couple weeks ago for a 2 year old birthday party and spotted this little fellow, with an abundance of neck fluff. Sleep tight little bunny.

Wednesday, August 05, 2009

Tuesday, August 04, 2009

Disappearing Desmond jacket

With the book dummy nearly finished, I've begun working on the jacket for Disappearing Desmond. Here are some of the sketches I sent my editor and designer. Which is your favorite? Which one do you think we picked?

PS This is a book about a shy kid who hides and comes up with creative ways to disappear into the background because he is afraid of being noticed.